This recipe is my family’s favorite, especially when paired with my mom’s sauce. It was also my first exposure to Italian cooking. My mother initially let me, at age three, turn the crank on the pasta machine. Later I was permitted to seal the ravioli with a fork; and, eventually, I was allowed to do all the tasks. Continuing this tradition, my kids have been helping me since before they were three, and my daughter, Gaby, can now make ravioli better than I can.
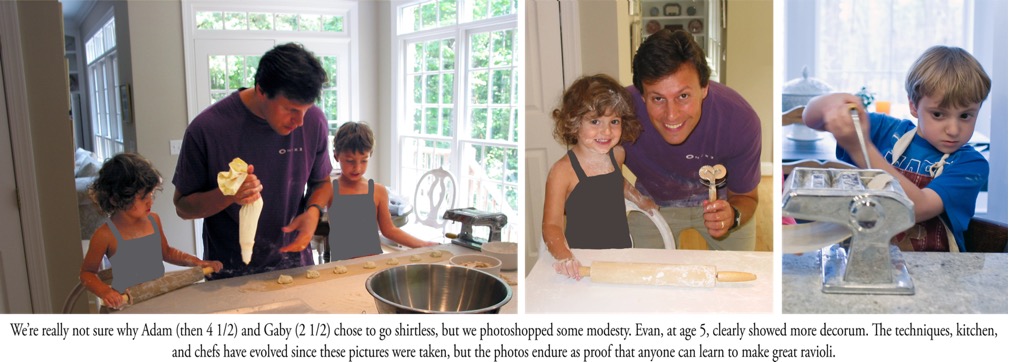
Though I learned to make ravioli using my mom’s recipe, I’ve since made major changes: 1) I make my own ricotta; 2) I use semola in the pasta dough; 3) I roll out the pasta dough in a way that consumes less time and less dough per raviolo; and 4) I prefer to roll out a big sheet of dough using a rolling pin (mattarello). The component recipes reflect these modifications. (Note also that I no longer use a pastry bag, as seen in the above photo, but simply a spoon as my mom did.)
Below, I describe two methods for rolling out and filling the dough: one using the long rolling pin (my now preferred method) and one using the pasta machine. For now, I just show photos the method using the pasta machine.
Dough
Pasta all’Uovo (default recipe) scaled to 1500g of total flour, prepared until it tells you to return here
Filling
Ripieno di Ricotta (default recipe) scaled to 6 lbs of ricotta, refrigerated until dough is ready for filling
METHOD #1: Using a long rolling pin (mattarello)
1. Read METHOD #2 below to get acquainted with it. It was the original way I used to do it and it has some very useful details that also apply here even though the rollout is very different.
2. Go to Pasta al Mattarello and roll out a large sheet of pasta using half (750 g) of the dough above. Once you get to be expert, you could try rolling out the whole thing, but it would be a little unwieldy.
3. Find the axis of symmetry of the rolled-out sheet, meaning the bisection line where each half of the circle/oval is the best mirror image of the other half. It's pretty hard to roll out a perfect circle/oval, so just choose the best dividing line you can.
4. Fill one half of the sheet with generous spoonfuls of fillings similar to what is done below. Be sure to keep the fillings on a grid, otherwise it will be harder to cup and cut between them without running into another filling.
5. Fold over the unpopulated half of the sheet (circle) to meet up with the half that was filled.
6. Cup around each filling similar to what is done below.
7. Use the crinkled edge of the pasta cutter to cut straightl lines between the fillings. Be very careful not to get too close to any filling.
8. Fork each raviolo and please them on a parchement paper lined pan or tray as described below. Again, don't be afraid to shift the filling under the dough in order to make it easier to fork them, and don't fork right up against the filling.
9. If you have left over scraps, you can turn them into Sfoglia Lorda. The really small scraps can simply be cut up into quadretti and also put in borth with the sfoglia lorda.
METHOD #2: Using a pasta machine (macchina per pasta)
1. Go to Pasta a Macchina and return here once you have rolled out a dough at the thinner setting.
2. Find the largest cookie sheet or rectangular pan that can fit in your freezer and line it with parchment paper. You'll be stacking ravioli three layers high, at most.
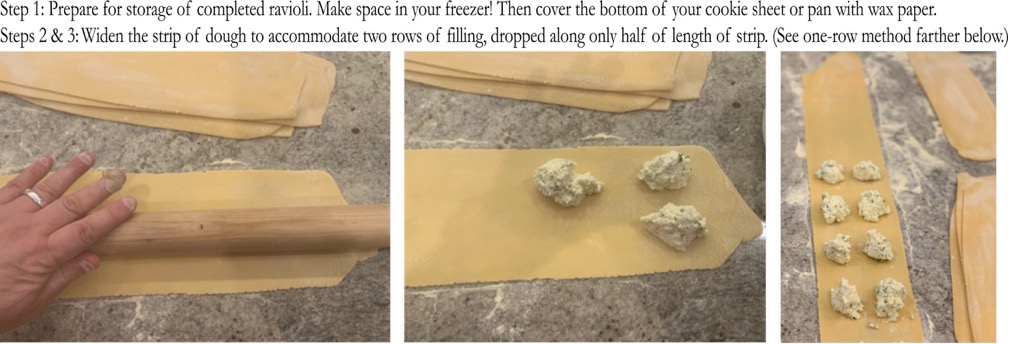
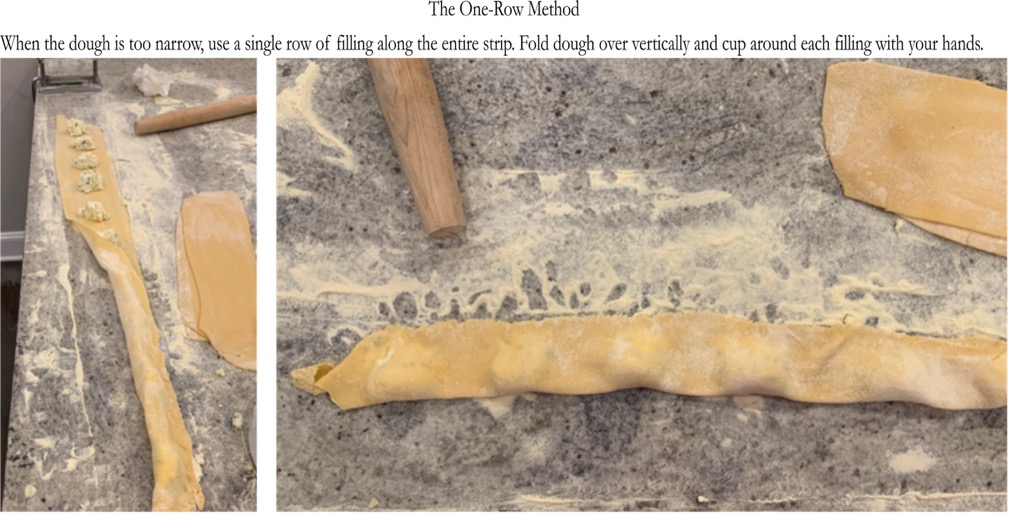
3. Use an unfloured rolling pin to widen the strip of dough enough to accommodate two rows of filling. (The pictures below also show how to switch to one-row mode if the dough simply comes out too narrow. For now, let’s continue with two-row mode…)
4. Drop generous spoonfuls of filling in two rows along HALF the length of the dough. (I no longer use a frosting bag as shown in the old photos above)
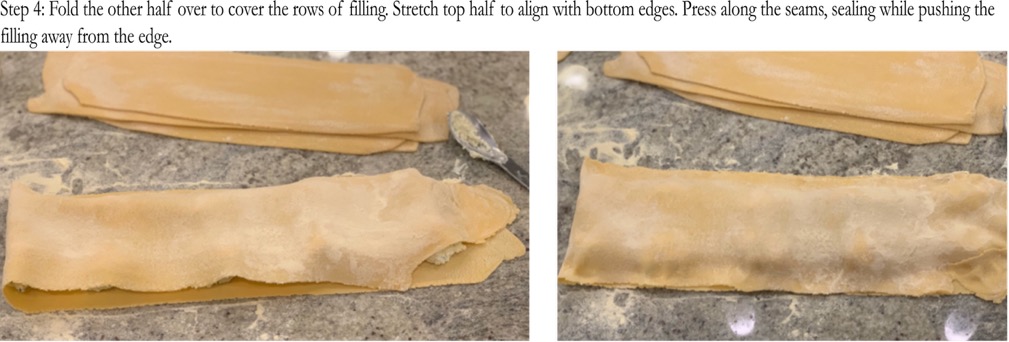
5. Fold the remaining half of dough over horizontally to cover the rows of filling. Stretch the top layer of dough so that its edges align with the bottom layer. Press along the edges to bind the layers of dough together while also pushing the filling away from the edge.
The guiding principle here and in the next steps is to create sealed pockets of filling, roomy enough not to burst when being boiled, with defined crimped borders of dough.
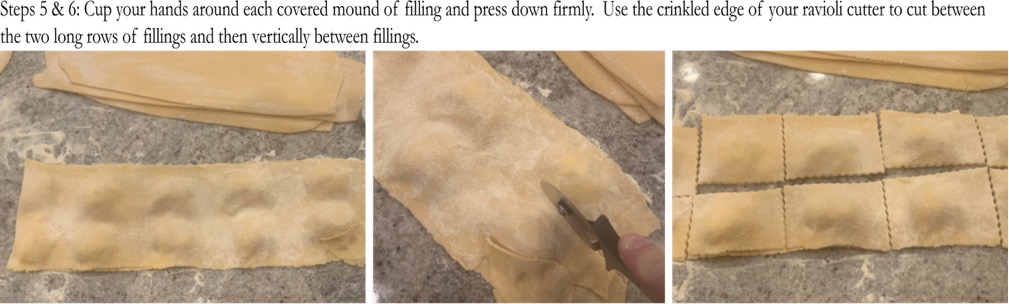
6. Cup your hands around each covered mound of filling and press down firmly. Be sure not to cup too closely to the filling, or the filling could erupt when cooked!
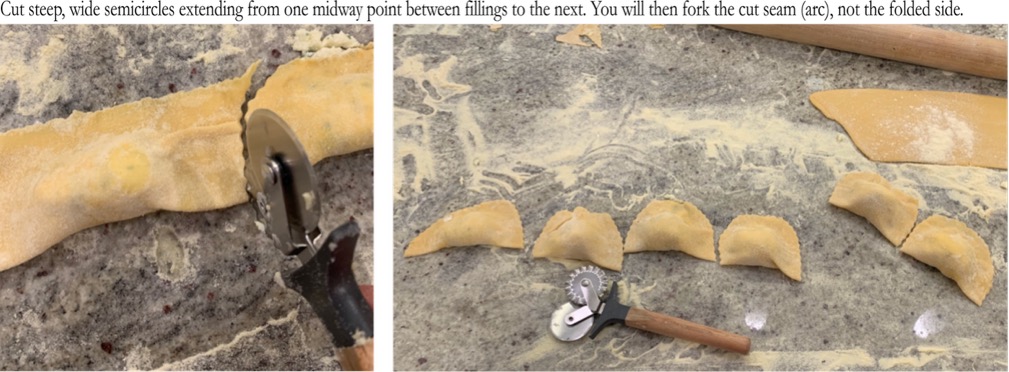
7. Make a horizontal cut, using the crinkled edge of your ravioli cutter, right between the two rows of fillings. Then make vertical cuts between pairs of fillings. You should now have square ravioli.
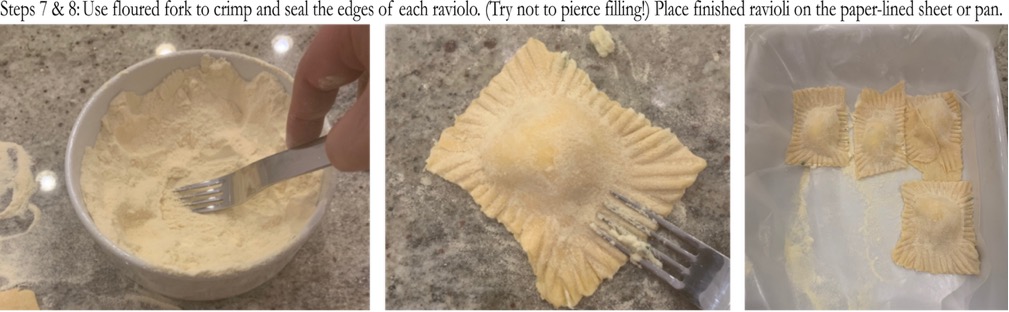
8. For each raviolo, gently push the filling toward the center and then use a floured fork to crimp and seal the edges. Be careful not to fork too closely to the filling as this could also cause the raviolo to rupture during cooking. (This is why we try to create wider borders.)
9. Place forked ravioli on the paper-lined sheet or pan. Once a layer is full, cover with another layer of wax paper or parchment paper. As soon as you have three layers, cover the pan well with aluminum foil and place it in the freezer. Do this even if you plan to cook the ravioli immediately.
10. Repeat previous steps until all the ravioli are made and in the freezer.
Make ahead: If you are not cooking them immediately, wait a day to transfer the fully frozen ravioli to plastic storage bags. Then return them to the freezer where they won’t get knocked around much—they are somewhat fragile.
BONUS: Instead of discarding the dough scraps, you could use them to make some spaghetti or fettuccine. (Knead the scraps together, not adding any flour; it already has too much, and you may need to run the dough through the machine more than usual to make it smoother.)
11. When you cook the ravioli, remove them from the freezer only when you’re ready to place them in strongly boiling water; otherwise, they might get too soft and fall apart as you transfer them to the water.
12. The ravioli are not done until they rise to the top of the boiling water. Even then, the edges will likely be a little too al dente and you’ll need to wait another 2-3 minutes. You may want to sample one to make sure you’re cooking them to your preferred doneness. What I do is grab one of the ravioli and cut off a little bit of the corner with a fork so as not to break into the sealed pocket. If it’s not done, I throw it back into the water to continue cooking happily and I use a different raviolo for the next taste test.
13. Serve ravioli in a wide, shallow pasta dish to minimize overlap. When pairing with a sauce, cover the bottom of the serving dish with a layer of sauce before adding the drained ravioli. Sprinkle a layer of grated Pecorino Romano over that, cover with the sauce, and then top off with more Pecorino Romano. These ravioli are also excellent without my mom’s sauce however. Simply dribble them with extra-virgin olive oil and then sprinkle with a generous amount of grated Pecorino Romano. Very slightly more complicated and worth the effort is to coat them with the Sugo al Limone. (If you already have ravioli in the freezer, this is a quick meal.)