Tortelloni
Tortelloni are very big tortellini. I like to fill them with the same Ripieno di Ricotta that we use for Ravioli, but I use the parmigiano-reggiano version of the filling.
I prefer to roll out the dough using a long rolling pin as described in Pasta al Mattarello. My goal with tortelloni is to showcase the filling, not the dough. With ravioli, the dough is a little thicker.
When I took the class at the Vecchia Scuola Bolognese (VSB), they liked to roll out the dough a little thicker, but I find normal thickness to be just fine. They recommend a square size of 6 cm (2.36") on a side. They used a special roller that could cut 5 columns at a time. These are available in the USA, but I currently just use a metric measuring tape and make small markings in each direction along the middle cross of the dough.
The technique for folding and sealing each tortellone is described below. It's a little harder than making ravioli, but very easy once you get that hang of it. I learned some key techniques from the Bolognese masters.
The techniques here are identical for making tortellini (I need to create a page for that), except that tortellini are 3 cm on a side rather than 6 cm. Traditional Bolognese tortellini are filled with meat and served always in a beef broth.
In terms of sauce, I prefer a light sauce, such as Sugo al Burro e Salvia or Sugo al Limone. You can also cook them in chicken broth or beef broth.
Dough
Pasta all’Uovo (00 flour recipe) with 500 g flour, prepared until it tells you to return here
Filling
Ripieno di Ricotta (parmigiano-reggiano recipe) scaled to 1 lb of ricotta, refrigerated until dough is ready for filling
Sauce
Sugo al Burro e Salvia OR Sugo al Limone OR simply olive oil and parmigiano-reggiano.
1. Use the techniques described at Pasta al Mattarello to roll out the dough using a long rolling pin to normal thickness, then return here.
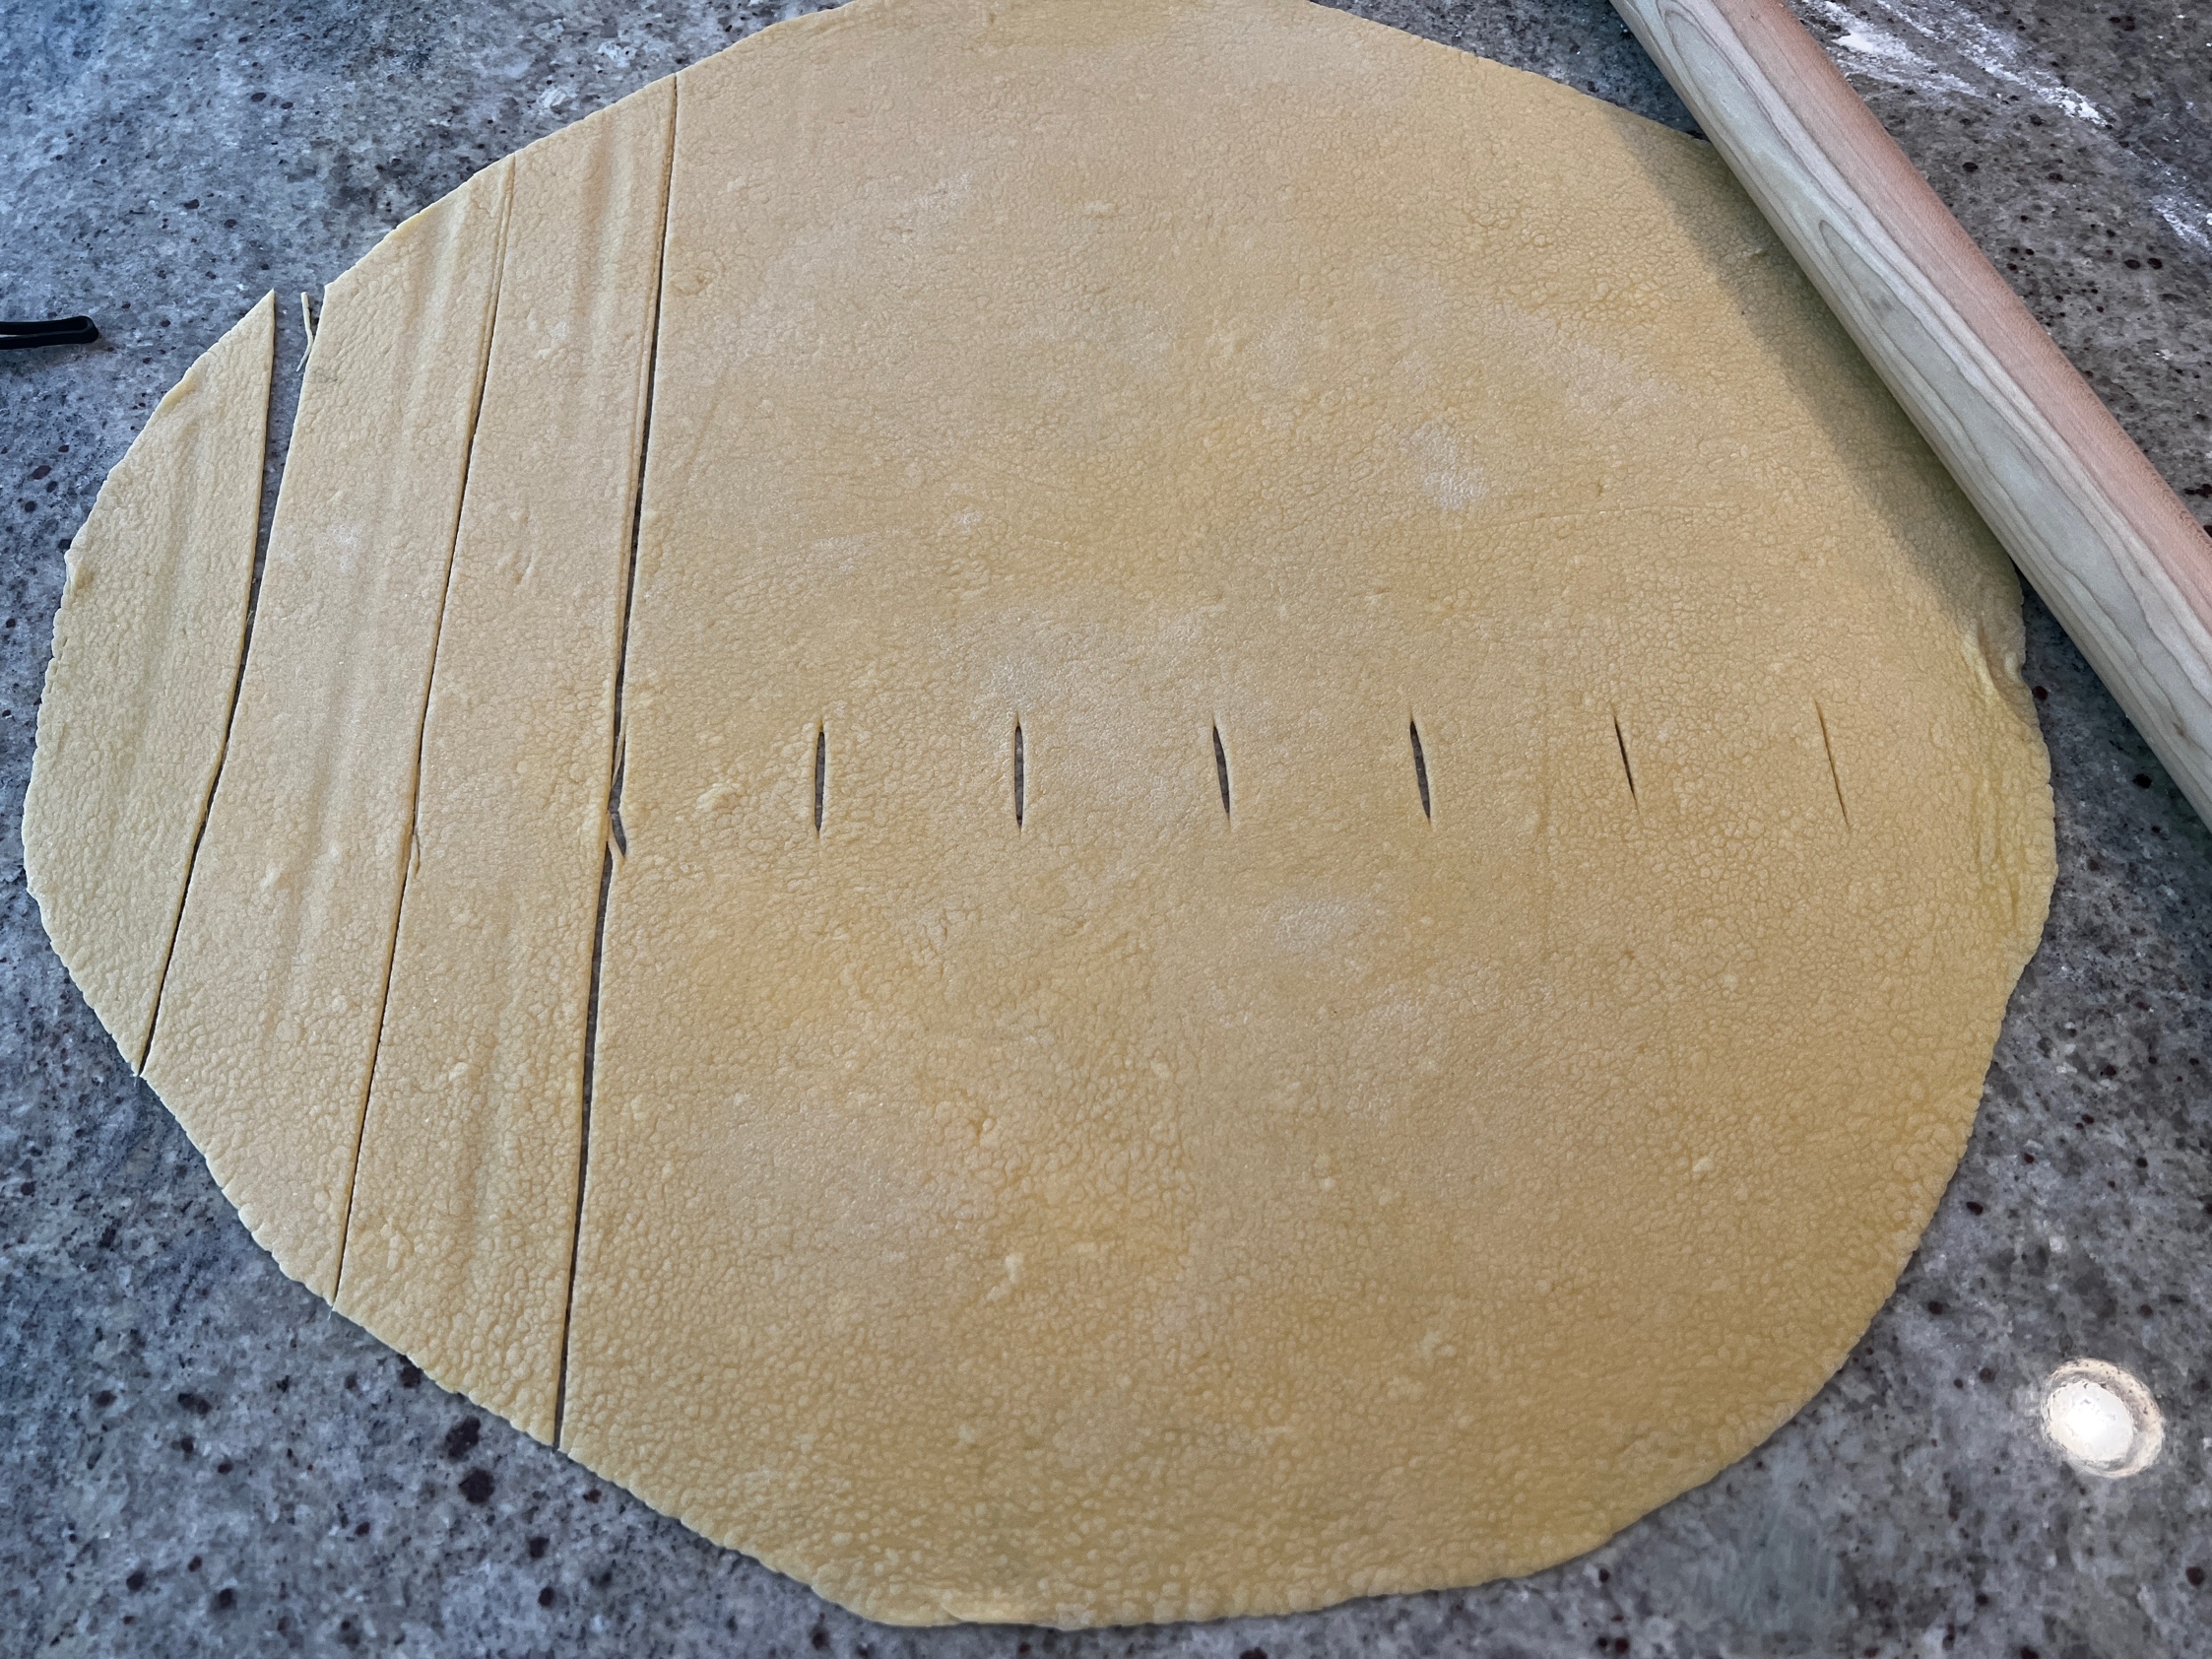
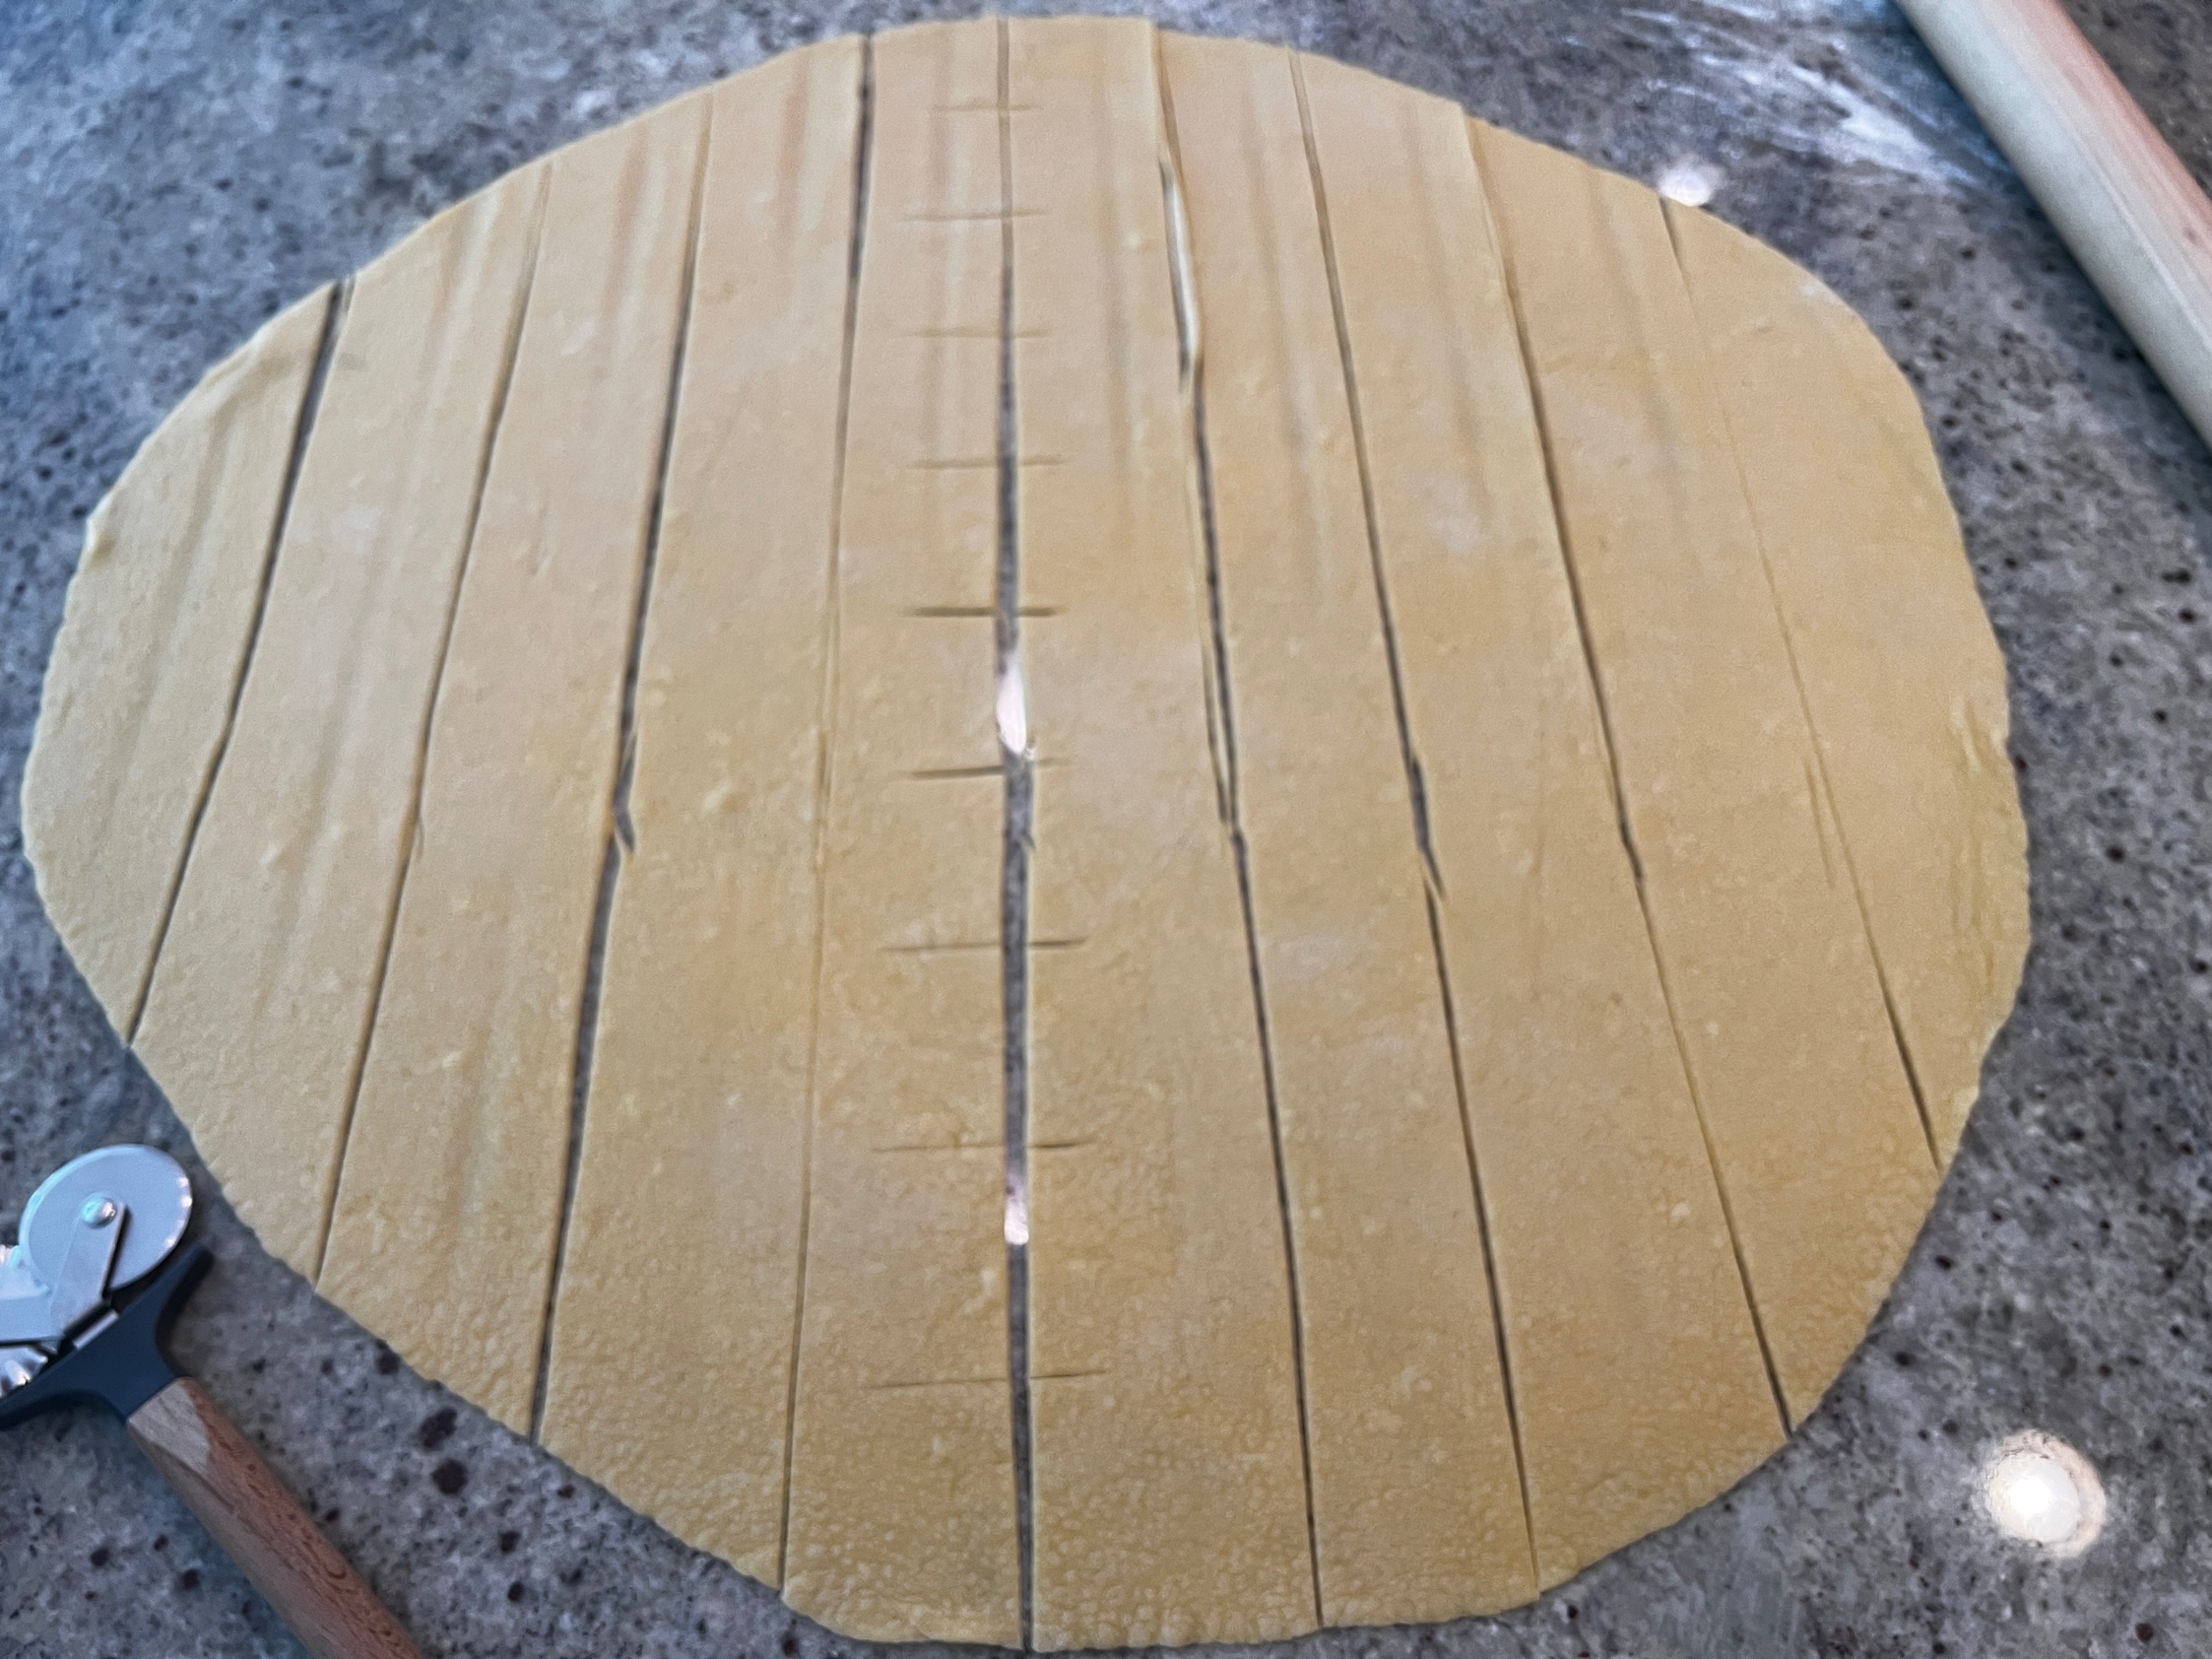
2. Using a measuring tape, make marks along X and Y dimensions in the middle of the dough every 6 cm.
3. Cut straight lines along these marks along X and Y dimensions. Use the straight edge of your cutter, not the crinkled edge. As mentioned above, having a multi-cutter will be easier and faster, obviously.
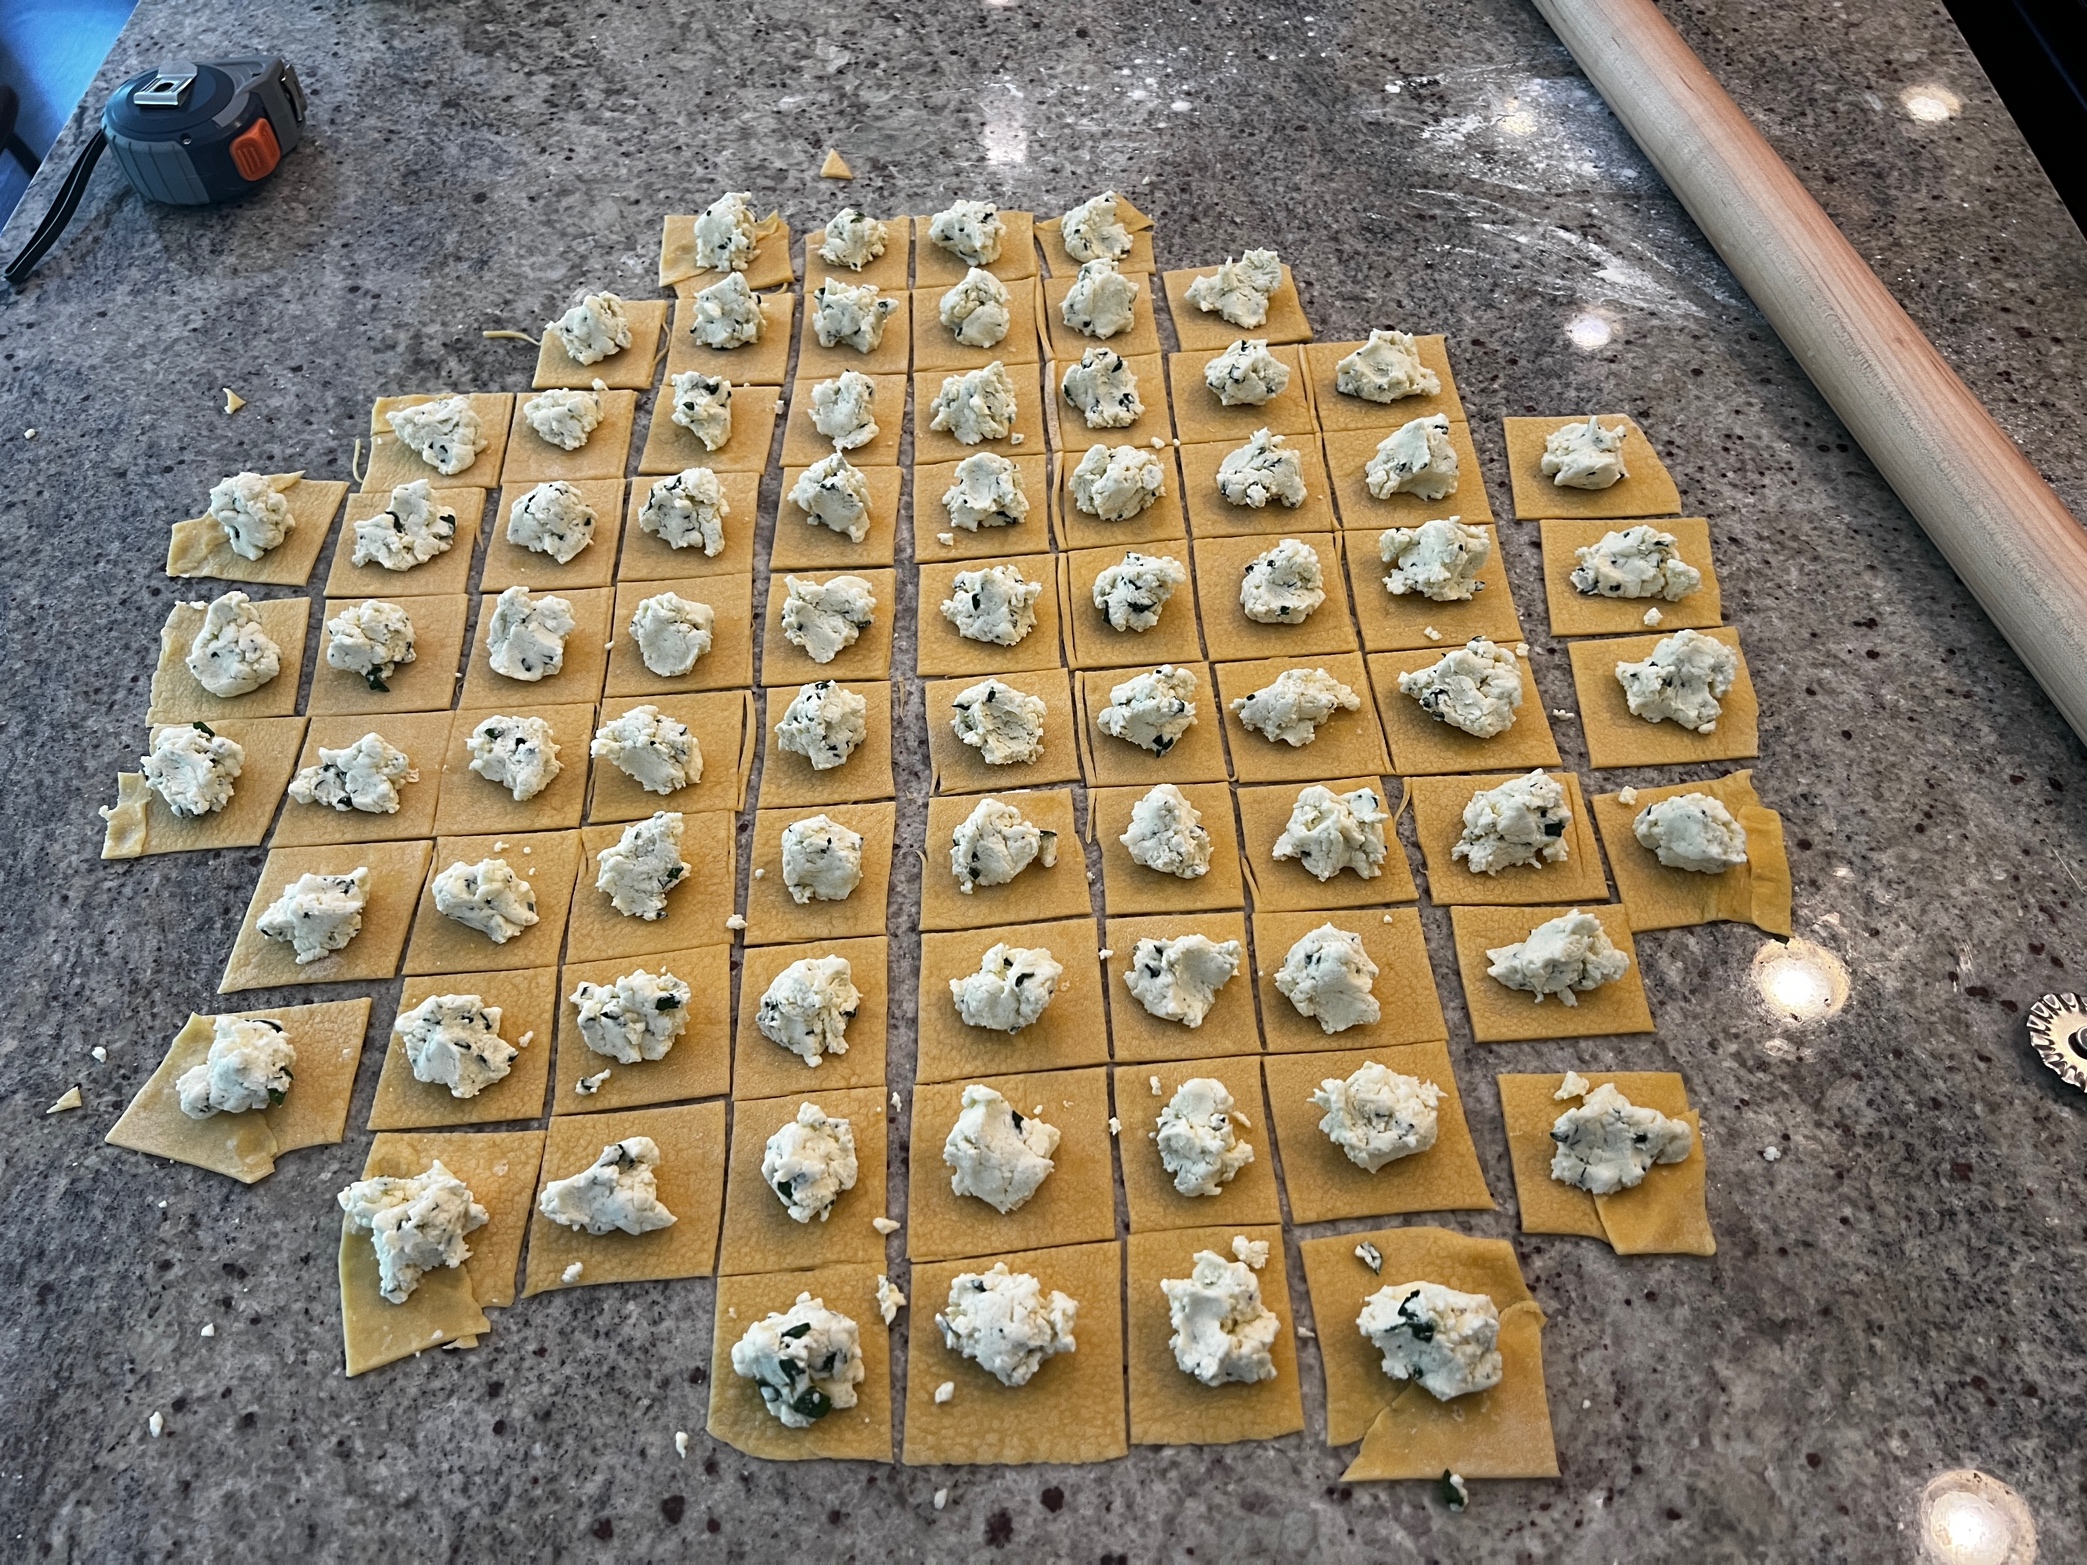
4. At this point, your entire sheet should be filled with squares of pasta, 6 cm on a side.
5. Some of your squares along the perimeter will be truncated. You can use other truncated pieces to build full squares as much as possible. It doesn't have to be perfect. See photo below.
6. Add filling to all squares.
7. Next we will discuss what to do to each square.
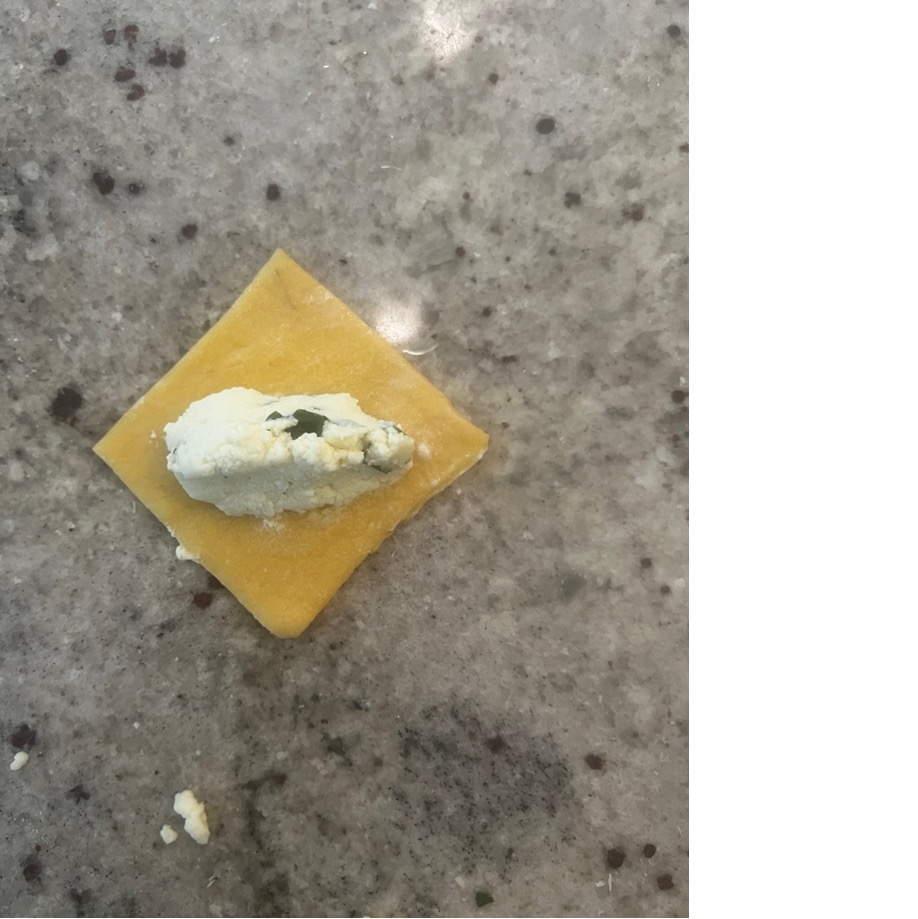
9. Looking at each square as a diamond, first spread the filling out horizontally toward the left and right points of the diamond. This will make more sense ina a couple steps.
10. Fold the bottom point of the diamond to the top point of the diamond. You will end up with a triangle. Squeeze along the edges. If the square has dried out a little, you can spray a little water before folding up the triangle. You can also cover unfilled squares with plastic wrap to keep them from drying out.
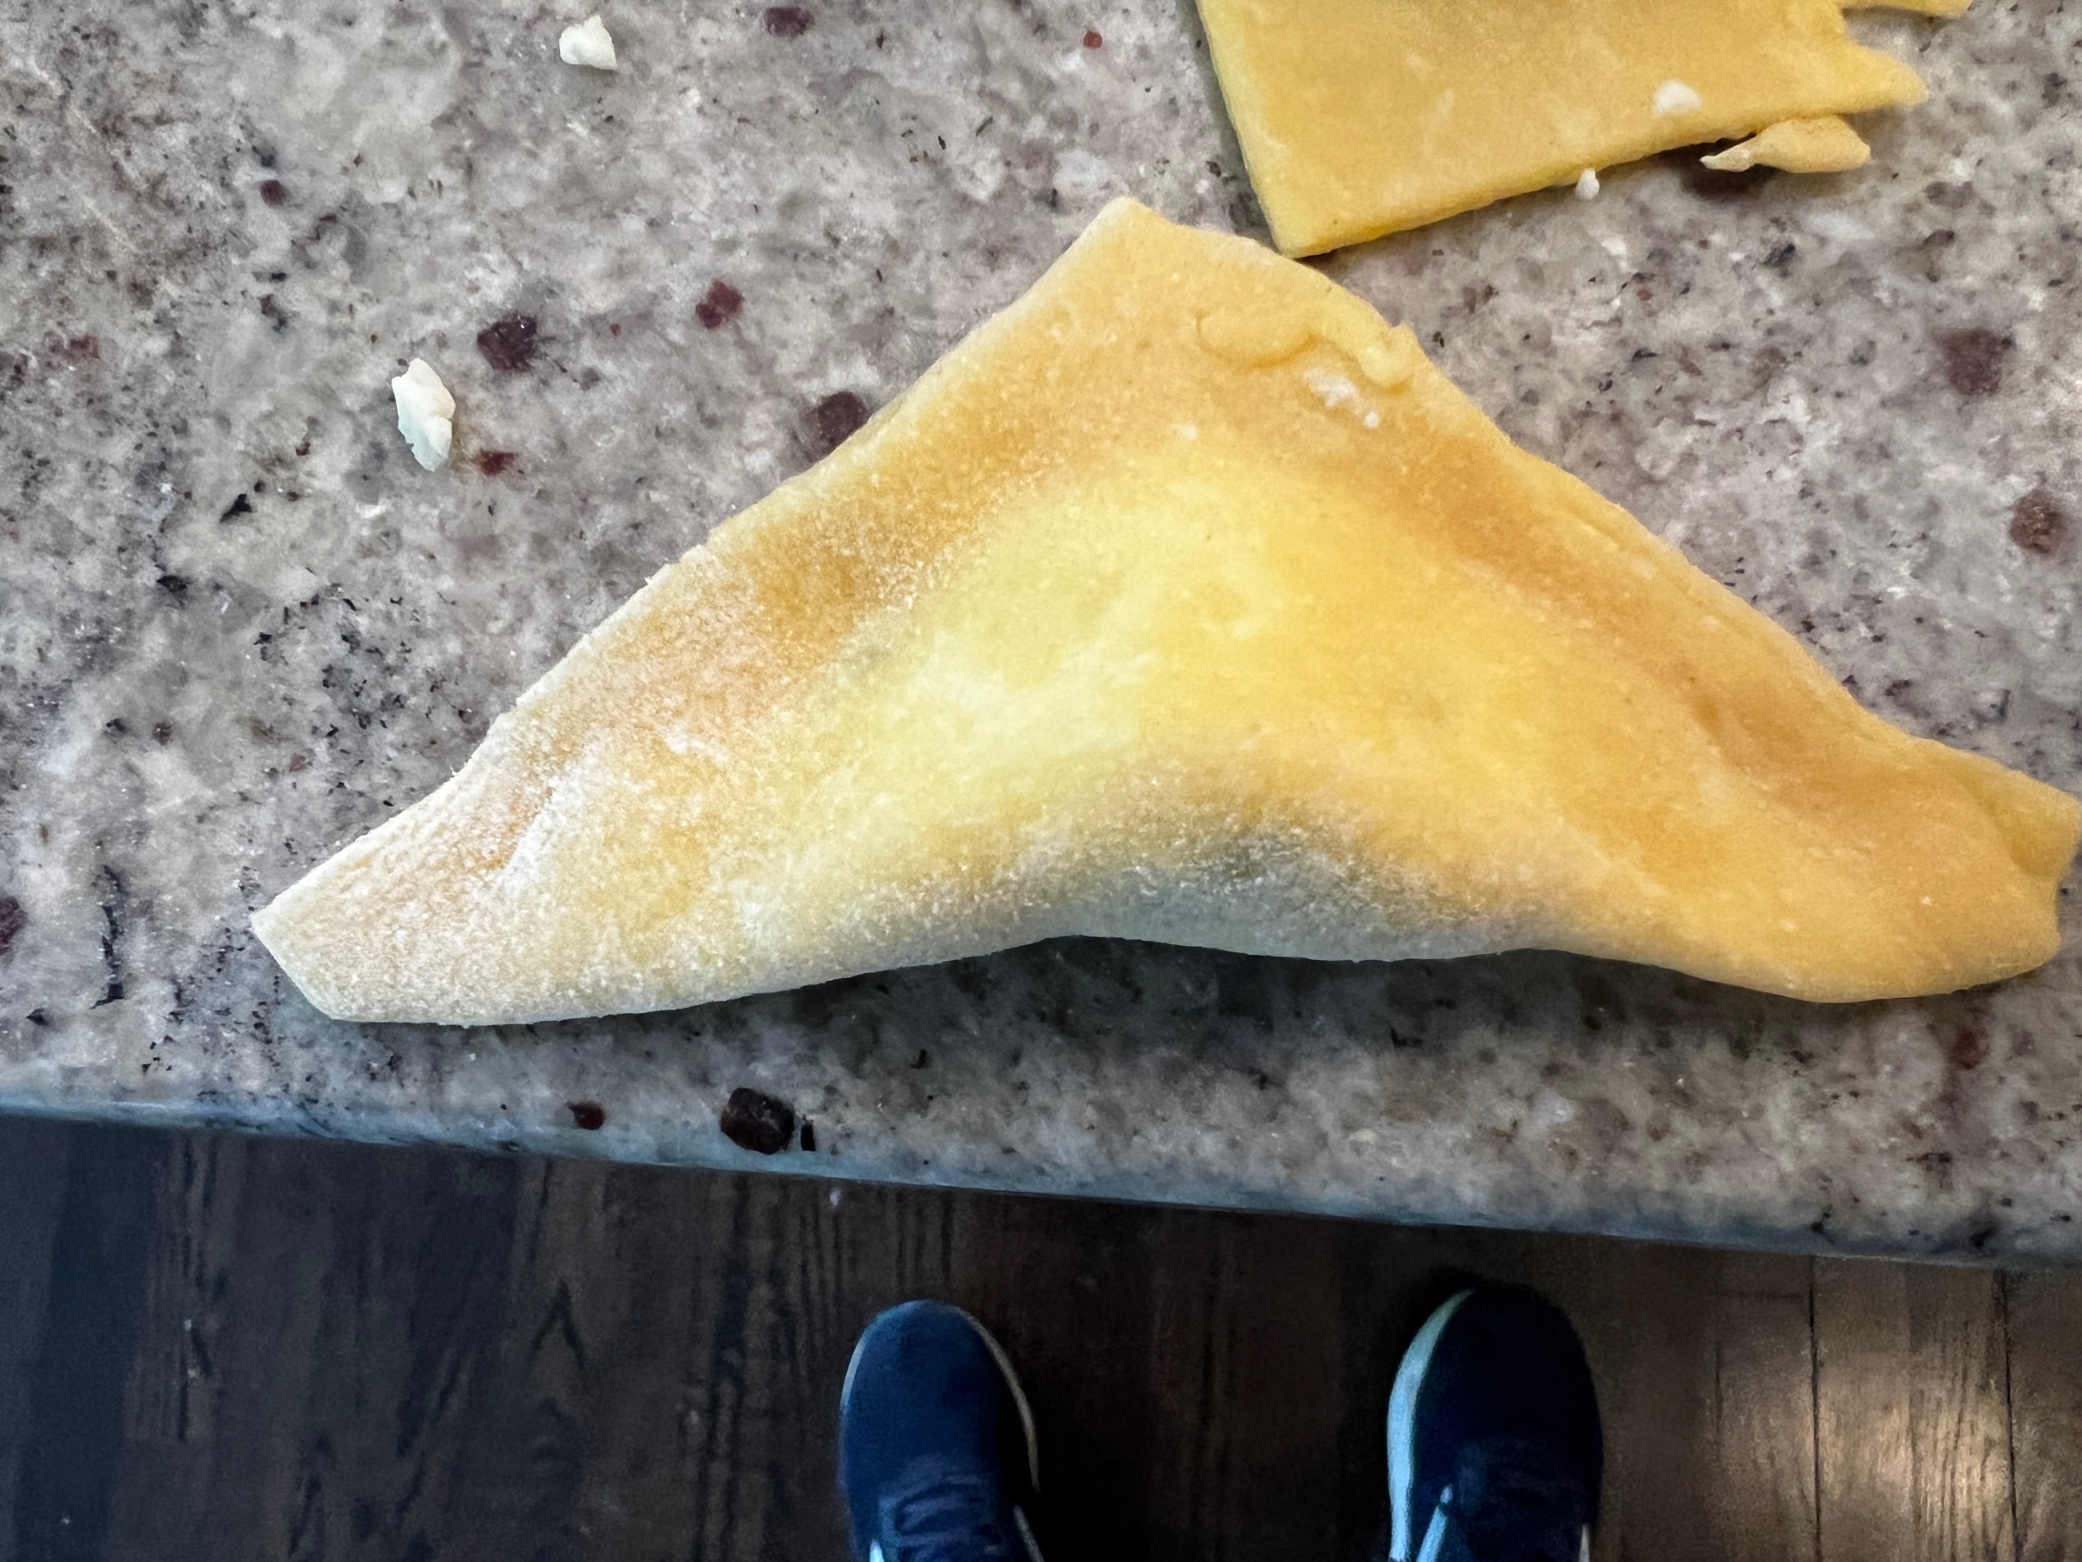
11. Pick up the triangle, with the top point up, and stretch the triangle out to make it wider and less tall. Here's the key part: as you do this, push filling toward the entire width of the base of the triangle. This will help make the final shape of the finished tortelloni look better. Having pre-spread it before folding up the triangle will have helped achieve this.
12. Continuing to hold the triangle with top point up, use your fingers on each side to curve the two sides toward you and ideally to end up a little higher than the filling part. This helps the tortellone to end up looking like an ear.
13. Take the bottom left and right points of the base of the triangle and fold them straight down towarwd each other (i.e., on the same plane as the rest of the triangle). Squeeze the point at which they meet until it is back to single thickness of the dough.
14. Stack the tortelloni one-high (only) in a pan lined with parchment paper.
15. Cover with aluminum foil and freeze if not using that day.
16. When it's time to cook them, add a small palmful of salt to the boiling water. They are close to done once they float back to the top. You can test one by cutting off the point a little and tasting, then throwing it back in the water.
17. Recommended sauces are described above.
18. Serve with grated parmiggiano-reggiano on the side and maybe a little on top. Serve with pecorino if you had used the filling with pecorino.
19. If you don't plan to cook them for a couple days, one way to get them to keep longer in the refrigerator is to blanche them, which means bringing water to a boil (without salt), throwing them in, and immediately taking them out when they float to the top. Instead, I just freeze them and take them out when it's time to cook them in boiling water. The Bolognese masters do not like freezing pasta.
I made 6 cm marks in the middle of the dough, then made straight cuts vertically:
After those vertical cuts are made, make the same kind of marks in the other direction:
And here are all of our squares, 6 cm on a side:
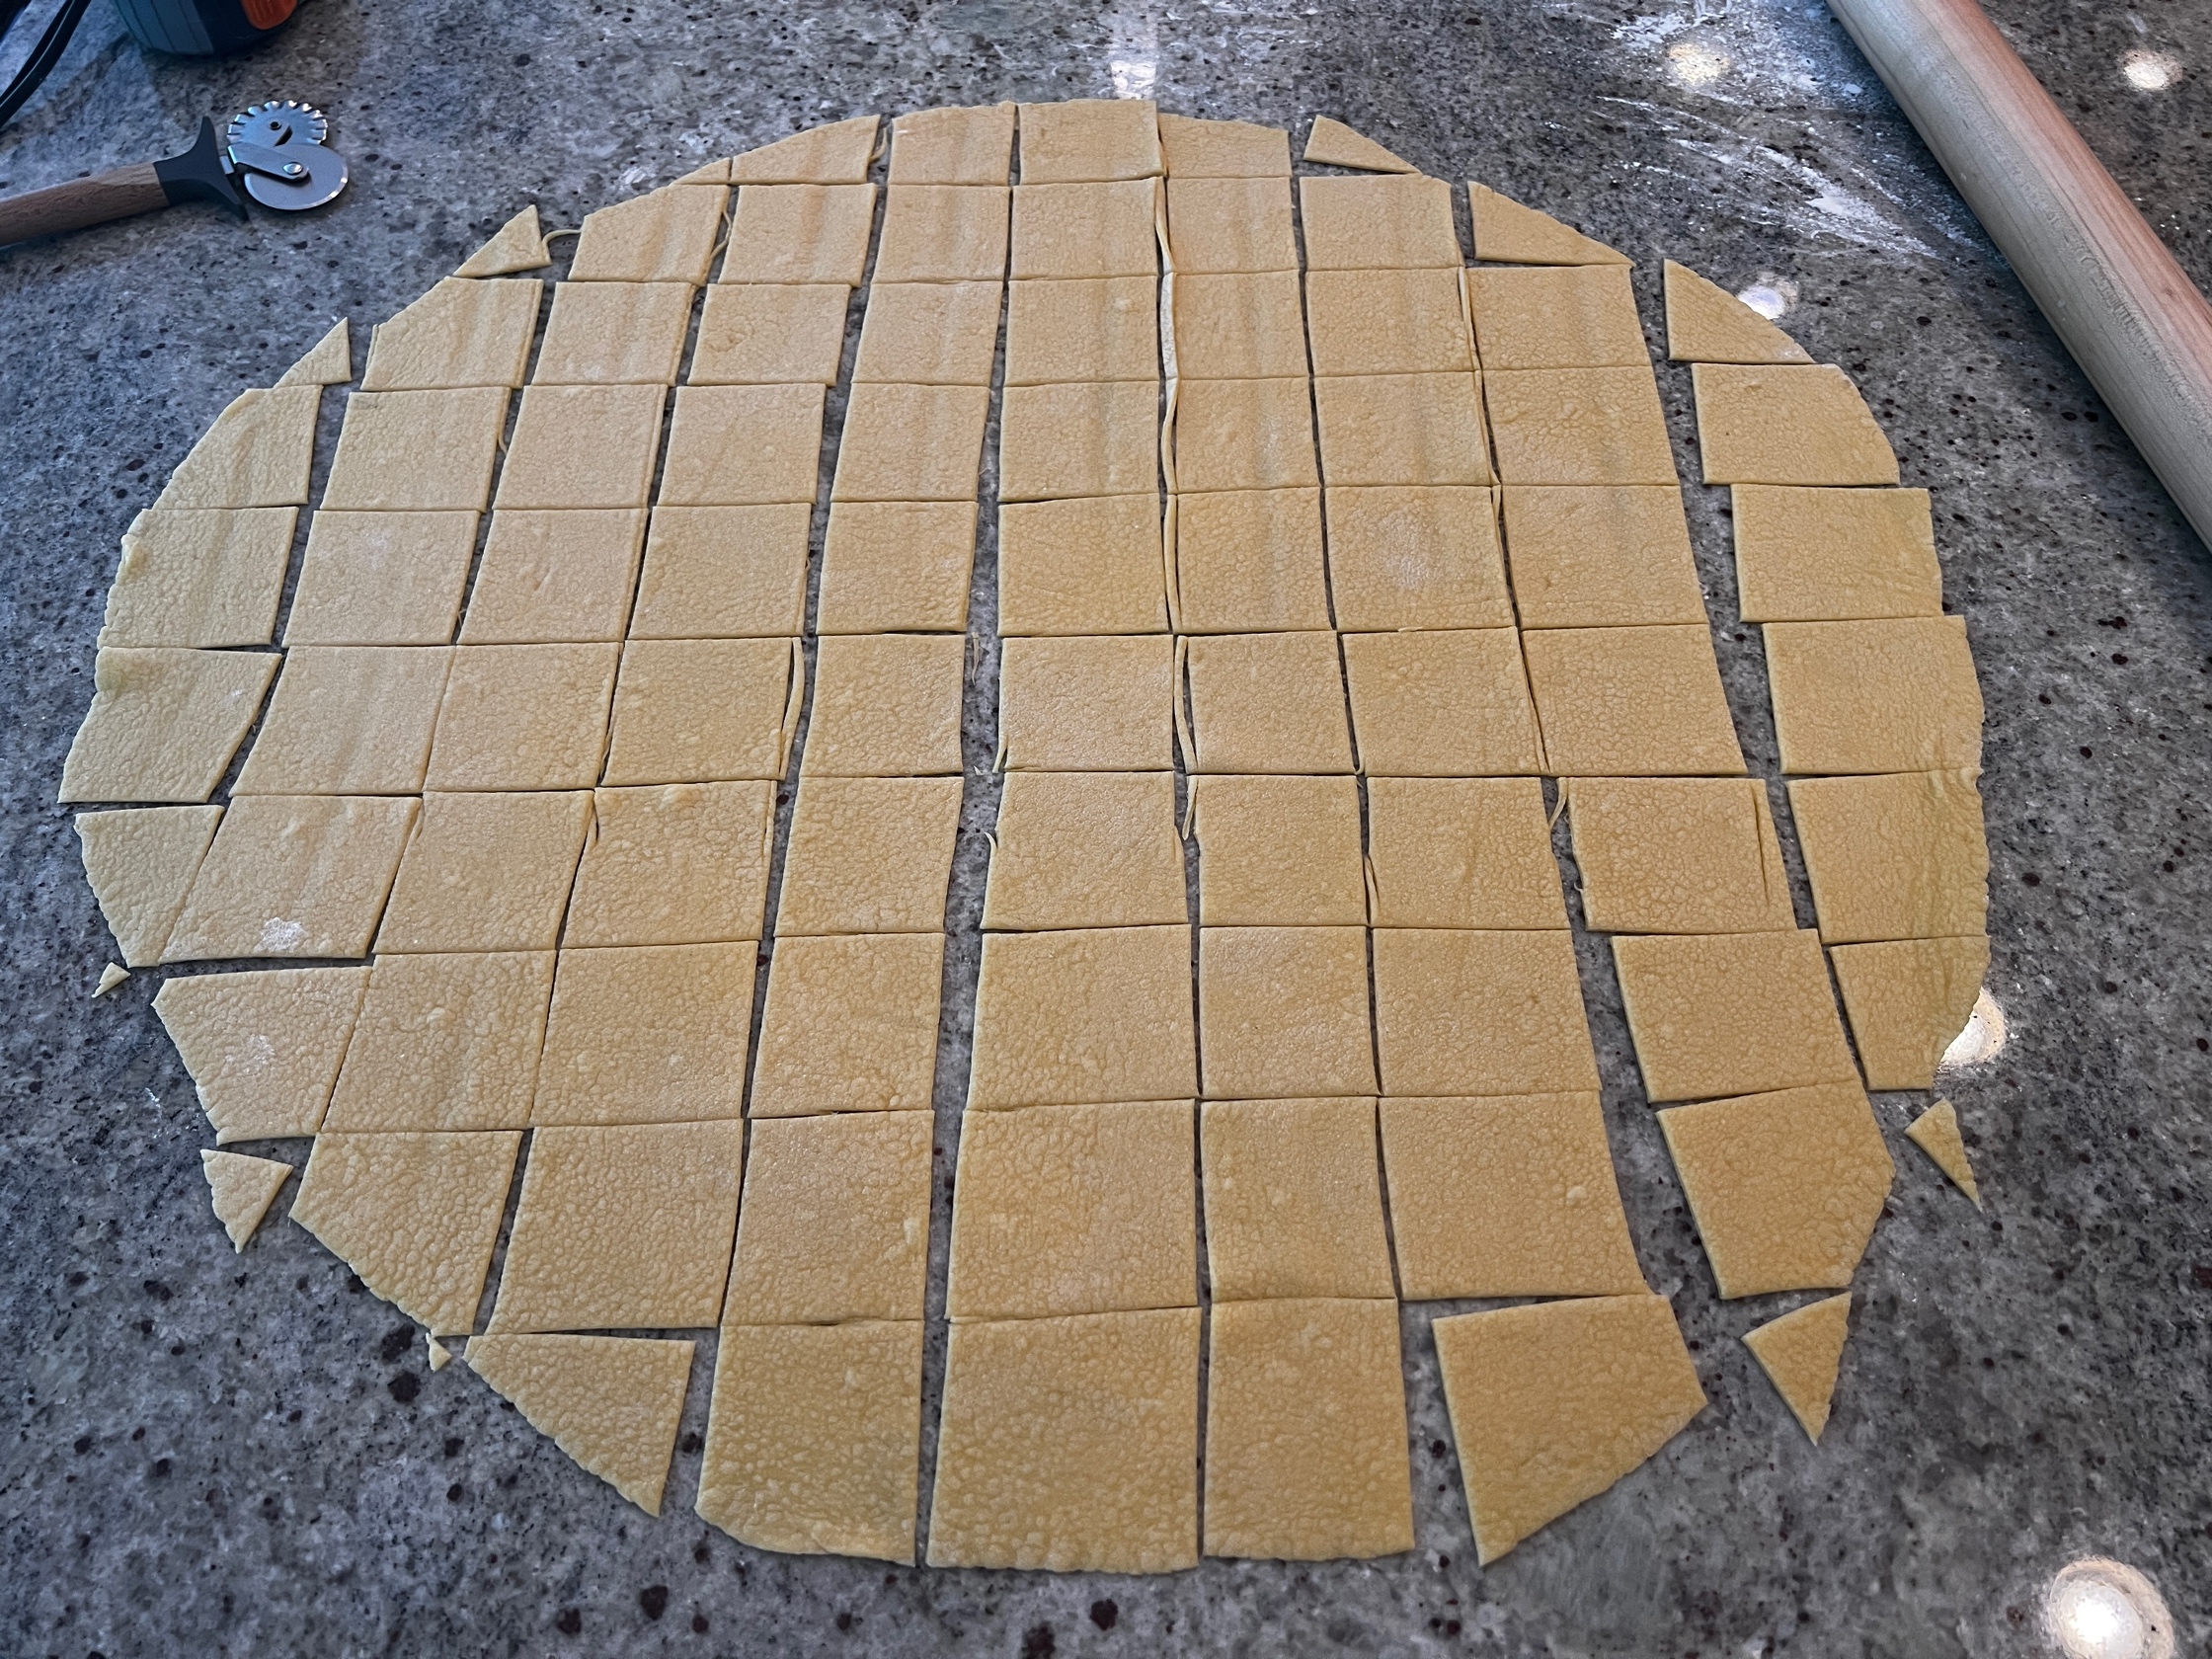
For a square along the perimeter that got truncated, we can form a full square using some other truncated piece. As you can see, it does not need to end up perfect:
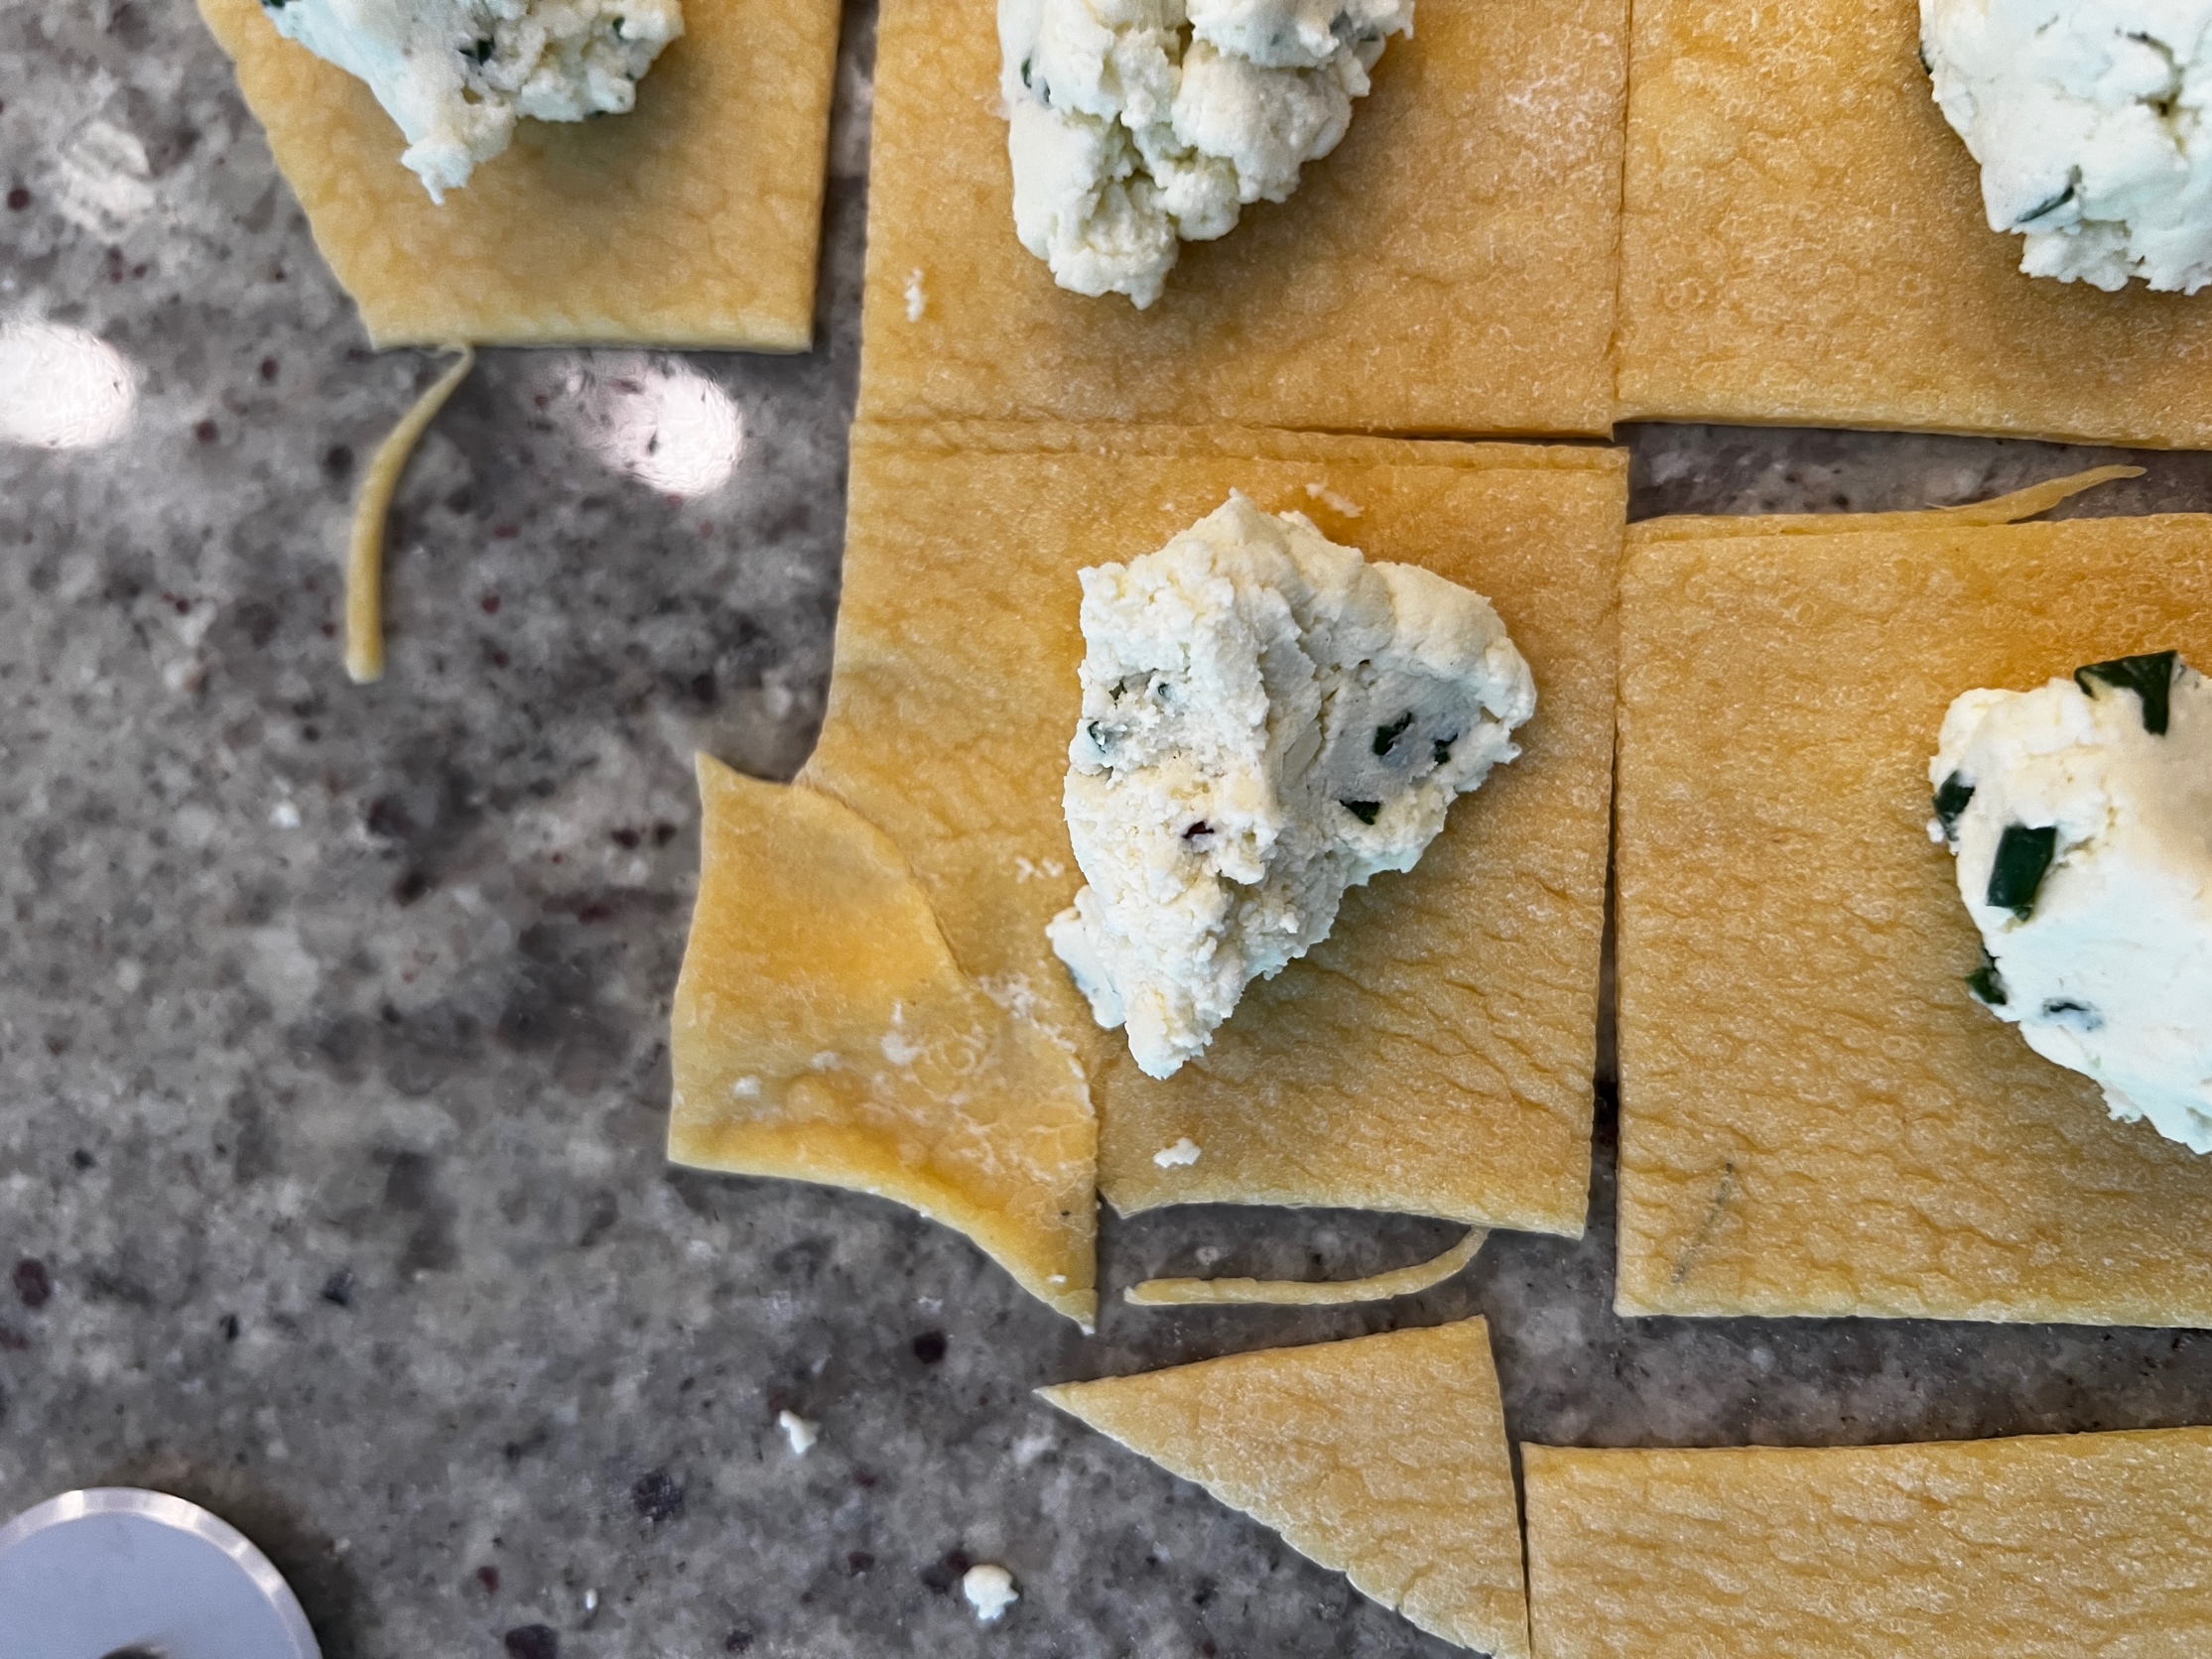
Here are all of our squares with filling on them, ready to be folded. If the last ones get a little dry, you can spray them with a little water:
Before folding up the triangle, it helps to spread out the filling horizontally. This will make more sense below where we widen the triangle:
Here's the triangle before widening it. We squeeze along the left and right edge to seal it. If it has dried out too much, you can first spray a little water before folding it up:

Here's the triangle after pulling it wider and pushing down some of the filling toward the lower two corners, which is very key. Having pre-spread-out the filling horizontally above makes it easier to continue this here:
After folding up the sides to form an "ear" (I should show a photo this, sorry), we take the two bottom points and fold them down within the plane of the triangle until they meet, then we squeeze them together to return to single dough thickness. Notice how the sides of the tortellone have filling in them all the way down toward the bottom point? That happened because of how we spread out the filling in the previous step. These same techniques apply equally to tortellini, which are just smaller (3 cm on a side):

Here's our tray of tortelloni. Unlike ravioli, I recommend not stacking them:
